
UPDATE: Thanks to the great SD Storage Update of Spring 2009, you no longer have to pad your card. HOWEVER, it has been discovered that game data from disc based titles released prior to the update (i.e. Animal Crossing, Rock Band, etc.) cannot be transferred to SHDC cards. They CAN, however, still be transferred to SD cards. So, until this issue is addressed in a future firmware update, a 4GB SD card is still the most viable alternative!
Special Thanks!: Kur, a reviewer on NewEgg for the idea of 'padding' the card with .AVI files, tripredicus for the space making program/tutorial/links, to Solofire for taking the time to run transfer time tests, Miranda for testing/confirming that the new version of SDFormatter works, and the folks at GBAtemp for the SDFormatter program!
ATTENTION !: For the people who DON'T LIKE TO READ, THIS SOLUTION ALLOWS YOU TO USE AN OTHERWISE UNSUPPORTED SIZE SD CARD (4GB) TO ITS FULL POTENTIAL AND STILL HAVE BETTER THAN AVERAGE TRANSFER SPEEDS! NO MODDING (hardware or software) NECESSARY!!
Okay! Now we all know that Nintendo's official line is that cards larger than 2GB will not work on the Wii...and for the most part this is true. However...what about a 4GB SD (NOT SDHC) card that PRETENDS it's a 2GB, but then over time can be slowly expanded to meet it's 4GB potential?
I scoured the net for info on how to get this to work, and now I present to you the fruits of my labor. Here is a mini FAQ on how to get 4GB SD cards to work on your Wii.
1st of all, get a hold of this non-SDHC SD card:
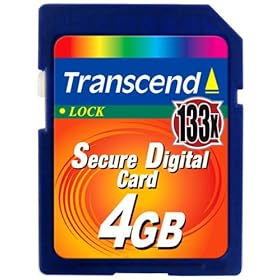
Here is a link for it at NewEgg:
http://www.newegg.com/Product/Product.aspx?Item=N82E16820208411
If you can get it cheaper, please post that in this thread.
OK! So you got your SD card. You'll notice that if you format it through Windows or your Disk Management, regardless if you do FAT/FAT16/FAT32, the Wii will NOT recognize it. No problem. Google and download an app called SDFormatter. Better yet, just use this link:
EDIT: Miranda discovered a new version of SDFormatter 2.0.0.3 that works great!
http://gbatemp.net/index.php?download=4003
EDIT: Solofire has determined that the long format might not be necessary, and to use these settings for the initial format with the SDFormatter program:
Format Type: QUICK
Format Size Adjustment = OFF
These are the default settings, so they should already be selected. But in case they are not, there you go.
Now, in case the above settings don't work for you, then do this:
Click OPTIONS
Select 'FULL (Erase ON)' under FORMAT TYPE and 'ON' under FORMAT SIZE ADJUSTMENT.
This format will take upwards of 3-5 minutes, but your card should work without any problems after that.
--------------------------------------------------------------------------------------------------
Okay, so now you format your SD with this program. It might take a LOT longer than a normal SD format. Don't panic!...it's normal. When this is done, if you were to insert the SD back into the Wii, it would at least display empty channels, which at least means it recognizes the card. However, you will not see a how many blocks remaining number, and the Wii will refuse to write data to it.
Bummer, right? No problem. Now the trick is to fool the Wii into thinking that your 4GB card is actually a 2 GB card.
1st, take your current Wii Card and make a copy of it on your computer. Then, drag that folder to the 4GB card to copy. Then go into my computer, right-click the SD card, select properties, and keep your eye on the free memory.
An empty 4GB card reads as 3.72 or so GB. In my case, after I copied my existing Wii data to it (544 MB), I had like 3.20 GB's of free space. If you were to insert the card now, you would SEE your Wii data, but would be unable in transfer anything to the SD from the Wii. You can only go one way...from the SD to the Wii.
Now comes the fun part. Your job is to get the free memory down to 1.99GB or lower...basically anything under 2.00GB. I accomplished this by using a 700 MB Naruto movie, 2 double episodes (298 MB and 285 MB) and a few odd episodes of Game Center CX which took me down to 1.99GB on the nose (took me some trial, error, and different sizes and genres of .AVI's to nail it). Doesn't matter what you use...apps, programs, porn....as long as it pads your card down to 1.99GB or lower, you're in business.
Thanks to tripedicus, padding your card is now easier than ever! Here's an insert of his post:
-------------------------------------------------------------------------
Here are a couple of files that should make your padding of the SD cards easier
http://www.sendspace.com/file/rk8idm
This is an app called creatfil.exe from the NT4 resource kit that creates any size dummy file for you by basically just making a text file with a bunch of spaces in it.
To use the application you copy the exe to the folder where you want to create the dummy files, open a command prompt to that folder and type 'creatfil.exe filename size'
- example C:\createfil.exe dummy.txt 1024 (this will create a 1 MB text file of nothing)
To make the process easier I've included a quick batch file we use on our Exchange servers here:
http://www.sendspace.com/file/jsqpoi
I've modified it so that it will create 10 100MB files where ever you execute it.
Create a new folder on your SD card
Copy both creatfil.exe and whitespace.bat to the new folder
Double click on whitespace.bat
Whenever you need more space you can just delete one or more of the dat files the whitespace batch file created. You can edit the batch file to have it create as many files of whatever size you need.
Hope this helps.
edit: here is a snazzy VBS script that will ask you how much space you need to fill and how big you want the dummy files. Much easier than my batch file.
http://www.sendspace.com/file/j5fl4j
Instructions!
1.) Create a new folder on your SD Card

2.) Name it Dummy Files

3.) Copy the creatfil.exe and createfile.vbs files to the Dummy Files folder

4.) Double-Click the vbs file, and enter the amount of whitespace you wish to create

5.) Click Ok, and now enter how many files you wish to create

6.) Click Ok, and now enter the FULL PATH to the folder on your SD card (example - F:\Dummy Files)

7.) Click Ok one last time and you should see a black command window pop up and creatfil.exe will start making your whitespace files. After it is done, you should have your whitespace files and a batch file in your Dummy Files folder that you can run again anytime to recreate the files.

=======================================================================================
After a quick 5 minute crash course in Command Prompt editing, I have modified tripedicus' original script and made it so that when it runs, this will automatically create 3 512MB files and 1 300MB file, which if you are starting with a brand new 4GB card, will set you up perfectly to use your card!
Here's THAT link: http://www.sendspace.com/file/827n4p
Note that whatever you use will be transparent, meaning that nobody would see your porn AVI's recognized as data. Just make sure that it's not one big azz file....I will explain why in a moment.
NOW put it in your Wii. You will now see something like this:

As you might have noticed, the number of blocks will be greatly increased for the same amount of Wii data! What you DON'T see is that I have 2 1/2 more pages of games on this card. On my 2GB card, my total blocks remaining was 11108!
*Also, a blank, freshly formatted 2GB card weighs in at 15466 blocks available, which makes my case with the picture above that much more solid.*
NOW! Some of you are saying, "Well geez Knoxx! I might as well stick with my 2GB card if I can't even use the full 4GB's of space!" Valid point. Now here's why you shouldn't:
1) The speed gain for transfers is comparable and in most cases a bit faster, depending greatly on factors such as brand, read/write speed, and format.
Here are the transfer times with this SD card compared to the Wii branded SanDisk 2GB SD using this method.
EDIT: Official test data from CAG member SOLOFIRE
--------------------------------------------------------------------------------------------------
Test setup: My Wii only had the required channels (Disk Channel, Mii Channel, Wii Shop Channel, Photo Channel 1.1, Forecast Channel, and News Channel).
This meant that there were 1800 free blocks for channels. Before every test, my Wii was reset to this state.
I tested 4 of my largest channels:

With my old card, a 2.0 GB SanDisk Wii-branded Card:
Transfer from Wii to SD card:
Transfer from SD card to Wii:
With my new card, a 4.0 GB Transcend 133x SD Card:
Transfer from Wii to SD card:
Wii Shop Channel to Wii:
EDIT 11/19/08: After I downloaded update 3.4, I tried my original benchmark for my 4GB card trick. I pulled those results down awhile ago, since it seemed to distract everyone from the real function of my "hack". So, as a refresher:
Original Wii to SD transfer times with 4GB card
--------------------------------------------
Mega Man 9 - 66 Blocks -
4GB SD transfer time: 18 sec
Sin & Punishment - 287 Blocks -
4GB SD transfer time: 1min 16sec
NEW Wii to SD transfer times with 4GB card
---------------------------------------------
Mega Man 9 - 66 Blocks -
4GB SD transfer time: 5 sec
Sin & Punishment - 287 Blocks -
4GB SD transfer time: 16 sec
Now, I would assume that transfer times for all cards have increased across the board, but I can only vouch for my card.
--------------------------------------------------------------------------------------------------
2) As you slowly fill your SD with videogamey goodness, and as you get low on blocks, stick your card back into your PC and lose that 700MB Naruto movie. When you stick it back in the Wii, your remaining blocks would have magically increased and you still have all of your previous data!
Bottom line: As long as your card's free memory stays at 1.99GB or lower, you WILL be able to use MOST if not ALL of that 3.72 GB's of space. It takes a little bit of juggling, but I feel it is worth it.
Well....there you go! You're welcome!!
Disclaimer: Whenever you decide to remove a file to increase your space, save a copy of the card in it's current state on your computer, just in case. I can't guarantee that this method is infallible, but it has been working AWESOME for me thus far. And who knows....if this makes too much noise, Nintendo might try to squash it (though I highly doubt it).
EDIT: Official test data (thanks to SOLOFIRE)
Special Thanks!: Kur, a reviewer on NewEgg for the idea of 'padding' the card with .AVI files, tripredicus for the space making program/tutorial/links, to Solofire for taking the time to run transfer time tests, Miranda for testing/confirming that the new version of SDFormatter works, and the folks at GBAtemp for the SDFormatter program!
ATTENTION !: For the people who DON'T LIKE TO READ, THIS SOLUTION ALLOWS YOU TO USE AN OTHERWISE UNSUPPORTED SIZE SD CARD (4GB) TO ITS FULL POTENTIAL AND STILL HAVE BETTER THAN AVERAGE TRANSFER SPEEDS! NO MODDING (hardware or software) NECESSARY!!
Okay! Now we all know that Nintendo's official line is that cards larger than 2GB will not work on the Wii...and for the most part this is true. However...what about a 4GB SD (NOT SDHC) card that PRETENDS it's a 2GB, but then over time can be slowly expanded to meet it's 4GB potential?
I scoured the net for info on how to get this to work, and now I present to you the fruits of my labor. Here is a mini FAQ on how to get 4GB SD cards to work on your Wii.
1st of all, get a hold of this non-SDHC SD card:
Here is a link for it at NewEgg:
http://www.newegg.com/Product/Product.aspx?Item=N82E16820208411
If you can get it cheaper, please post that in this thread.
OK! So you got your SD card. You'll notice that if you format it through Windows or your Disk Management, regardless if you do FAT/FAT16/FAT32, the Wii will NOT recognize it. No problem. Google and download an app called SDFormatter. Better yet, just use this link:
EDIT: Miranda discovered a new version of SDFormatter 2.0.0.3 that works great!
http://gbatemp.net/index.php?download=4003
EDIT: Solofire has determined that the long format might not be necessary, and to use these settings for the initial format with the SDFormatter program:
Format Type: QUICK
Format Size Adjustment = OFF
These are the default settings, so they should already be selected. But in case they are not, there you go.
Now, in case the above settings don't work for you, then do this:
Click OPTIONS
Select 'FULL (Erase ON)' under FORMAT TYPE and 'ON' under FORMAT SIZE ADJUSTMENT.
This format will take upwards of 3-5 minutes, but your card should work without any problems after that.
--------------------------------------------------------------------------------------------------
Okay, so now you format your SD with this program. It might take a LOT longer than a normal SD format. Don't panic!...it's normal. When this is done, if you were to insert the SD back into the Wii, it would at least display empty channels, which at least means it recognizes the card. However, you will not see a how many blocks remaining number, and the Wii will refuse to write data to it.
Bummer, right? No problem. Now the trick is to fool the Wii into thinking that your 4GB card is actually a 2 GB card.
1st, take your current Wii Card and make a copy of it on your computer. Then, drag that folder to the 4GB card to copy. Then go into my computer, right-click the SD card, select properties, and keep your eye on the free memory.
An empty 4GB card reads as 3.72 or so GB. In my case, after I copied my existing Wii data to it (544 MB), I had like 3.20 GB's of free space. If you were to insert the card now, you would SEE your Wii data, but would be unable in transfer anything to the SD from the Wii. You can only go one way...from the SD to the Wii.
Now comes the fun part. Your job is to get the free memory down to 1.99GB or lower...basically anything under 2.00GB. I accomplished this by using a 700 MB Naruto movie, 2 double episodes (298 MB and 285 MB) and a few odd episodes of Game Center CX which took me down to 1.99GB on the nose (took me some trial, error, and different sizes and genres of .AVI's to nail it). Doesn't matter what you use...apps, programs, porn....as long as it pads your card down to 1.99GB or lower, you're in business.
Thanks to tripedicus, padding your card is now easier than ever! Here's an insert of his post:
-------------------------------------------------------------------------
Here are a couple of files that should make your padding of the SD cards easier
http://www.sendspace.com/file/rk8idm
This is an app called creatfil.exe from the NT4 resource kit that creates any size dummy file for you by basically just making a text file with a bunch of spaces in it.
To use the application you copy the exe to the folder where you want to create the dummy files, open a command prompt to that folder and type 'creatfil.exe filename size'
- example C:\createfil.exe dummy.txt 1024 (this will create a 1 MB text file of nothing)
To make the process easier I've included a quick batch file we use on our Exchange servers here:
http://www.sendspace.com/file/jsqpoi
I've modified it so that it will create 10 100MB files where ever you execute it.
Create a new folder on your SD card
Copy both creatfil.exe and whitespace.bat to the new folder
Double click on whitespace.bat
Whenever you need more space you can just delete one or more of the dat files the whitespace batch file created. You can edit the batch file to have it create as many files of whatever size you need.
Hope this helps.
edit: here is a snazzy VBS script that will ask you how much space you need to fill and how big you want the dummy files. Much easier than my batch file.
http://www.sendspace.com/file/j5fl4j
Instructions!
1.) Create a new folder on your SD Card
2.) Name it Dummy Files
3.) Copy the creatfil.exe and createfile.vbs files to the Dummy Files folder
4.) Double-Click the vbs file, and enter the amount of whitespace you wish to create
5.) Click Ok, and now enter how many files you wish to create
6.) Click Ok, and now enter the FULL PATH to the folder on your SD card (example - F:\Dummy Files)
7.) Click Ok one last time and you should see a black command window pop up and creatfil.exe will start making your whitespace files. After it is done, you should have your whitespace files and a batch file in your Dummy Files folder that you can run again anytime to recreate the files.
=======================================================================================
After a quick 5 minute crash course in Command Prompt editing, I have modified tripedicus' original script and made it so that when it runs, this will automatically create 3 512MB files and 1 300MB file, which if you are starting with a brand new 4GB card, will set you up perfectly to use your card!
Here's THAT link: http://www.sendspace.com/file/827n4p
Note that whatever you use will be transparent, meaning that nobody would see your porn AVI's recognized as data. Just make sure that it's not one big azz file....I will explain why in a moment.
NOW put it in your Wii. You will now see something like this:
As you might have noticed, the number of blocks will be greatly increased for the same amount of Wii data! What you DON'T see is that I have 2 1/2 more pages of games on this card. On my 2GB card, my total blocks remaining was 11108!
*Also, a blank, freshly formatted 2GB card weighs in at 15466 blocks available, which makes my case with the picture above that much more solid.*
NOW! Some of you are saying, "Well geez Knoxx! I might as well stick with my 2GB card if I can't even use the full 4GB's of space!" Valid point. Now here's why you shouldn't:
1) The speed gain for transfers is comparable and in most cases a bit faster, depending greatly on factors such as brand, read/write speed, and format.
Here are the transfer times with this SD card compared to the Wii branded SanDisk 2GB SD using this method.
EDIT: Official test data from CAG member SOLOFIRE
--------------------------------------------------------------------------------------------------
Test setup: My Wii only had the required channels (Disk Channel, Mii Channel, Wii Shop Channel, Photo Channel 1.1, Forecast Channel, and News Channel).
This meant that there were 1800 free blocks for channels. Before every test, my Wii was reset to this state.
I tested 4 of my largest channels:
- Y's Book I & II - 272 blocks
- Sin & Punishment - 287 blocks
- Paper Mario - 249 blocks
- Internet Channel - 232 blocks
With my old card, a 2.0 GB SanDisk Wii-branded Card:
Transfer from Wii to SD card:
- Y's Book I & II - 1 min 16.81 sec
- Sin & Punishment - 1 min 29.10 sec
- Paper Mario - 5 min 8.95 sec*
- Internet Channel - 1 min 21.92 sec
Transfer from SD card to Wii:
- Y's Book I & II - 57.95 sec
- Sin & Punishment - 1 min 2.17 sec
- Paper Mario - 53.43 sec
- Internet Channel - 1 min 1.9 sec
With my new card, a 4.0 GB Transcend 133x SD Card:
Transfer from Wii to SD card:
- Y's Book I & II - 55.52 sec (28% faster)
- Sin & Punishment - 59.49 sec (33% faster)
- Paper Mario - 56.34 sec (91% faster)
- Internet Channel - 58.91 sec (28% faster)
- Y's Book I & II - 51.21 sec (12% faster)
- Sin & Punishment - 54.48 sec (12% faster)
- Paper Mario - 45.33 sec (15% faster)
- Internet Channel - 1 min 0.60 sec (2% faster)
Wii Shop Channel to Wii:
- Y's Book I & II - 4 min 44.86 sec
- Sin & Punishment - 3 min 52.34 sec
- Paper Mario - 2 min 34.41 sec
- Internet Channel - 2 min 10.32 sec
EDIT 11/19/08: After I downloaded update 3.4, I tried my original benchmark for my 4GB card trick. I pulled those results down awhile ago, since it seemed to distract everyone from the real function of my "hack". So, as a refresher:
Original Wii to SD transfer times with 4GB card
--------------------------------------------
Mega Man 9 - 66 Blocks -
4GB SD transfer time: 18 sec
Sin & Punishment - 287 Blocks -
4GB SD transfer time: 1min 16sec
NEW Wii to SD transfer times with 4GB card
---------------------------------------------
Mega Man 9 - 66 Blocks -
4GB SD transfer time: 5 sec
Sin & Punishment - 287 Blocks -
4GB SD transfer time: 16 sec
Now, I would assume that transfer times for all cards have increased across the board, but I can only vouch for my card.
--------------------------------------------------------------------------------------------------
2) As you slowly fill your SD with videogamey goodness, and as you get low on blocks, stick your card back into your PC and lose that 700MB Naruto movie. When you stick it back in the Wii, your remaining blocks would have magically increased and you still have all of your previous data!
Bottom line: As long as your card's free memory stays at 1.99GB or lower, you WILL be able to use MOST if not ALL of that 3.72 GB's of space. It takes a little bit of juggling, but I feel it is worth it.
Well....there you go! You're welcome!!
Disclaimer: Whenever you decide to remove a file to increase your space, save a copy of the card in it's current state on your computer, just in case. I can't guarantee that this method is infallible, but it has been working AWESOME for me thus far. And who knows....if this makes too much noise, Nintendo might try to squash it (though I highly doubt it).
EDIT: Official test data (thanks to SOLOFIRE)
Last edited by a moderator:
 my 2GB...be HAPPY that you can use a 4GB even though it's not officially supported!

